Run an Express-like Web server on RPi Pico W
Launched in January 2021, Raspberry Pi Pico is a tiny yet amazing piece of tech that democratised physical computing with it's low price tag of 4$. However, the WiFi-enabled Raspberry Pi Pico W introduced in June last year, turned that into a revolution paving a way for countless number of real-world projects.
One such interesting project is to use Pi Pico W to host your dynamic websites or APIs. And with open-source libraries like MicroPython and Pimoroni Phew, it's easier than ever before to turn this small device into a self-contained Express-like (Node JS) web server.
This article assumes you know how to connect RPI Pico to your PC in firmware download mode. If not, please follow the instructions here for Pico W. Although, we do highlight some of the steps below:
Flashing MicroPython on Raspberry Pi Pico W
Firstly, we have to flash the MicroPython firmware on the Pico.
- While pressing the 'BOOTSEL' button on your Pico, connect it to the PC until it shows up a removable drive.
- Download the latest MicroPython image using this link. Drag and drop the UF2 file in to Pico drive. The board will restart automatically and MicroPython will start running.
Download and set-up Thonny
Thonny is a powerful Python IDE that makes it easy to program Microcontrollers based boards. We'll use that to, both write the code and download the appropriate libraries.
- Download Thonny from the official website, which also comes with bundled Python.
- Run the installation package to install Thonny on your system. Advanced users can also install it manually while re-using their existing Python version.
- Once installed, open the software and go to Tools -> Options. Make sure Pico is connected to your PC in non-download mode (Removable drive won't appear).
- Open the 'Interpreter' tab and select 'MicroPython (Raspberry Pi Pico)' from the Interpreter drop-down. Then select 'Try to detect port automatically' from the Port drop-down.
- Press the OK button. You should see Raspberry Pi Pico in the 'Files' view at the left side and also the running MicroPython interpreter in the 'Shell' view.
Convert your Pico W into a Web server
To convert Pico into a web server, we'll use an open-source Python library by Pimoroni called Phew!. It's a microcontroller-optimised server and templating library for the Pico W. Make sure you follow the steps above as we'll use Thonny to install Pimoroni Phew.
- Open the Thonny IDE and verify that it says 'MicroPython (Raspberry Pi Pico)' on the bottom right side.
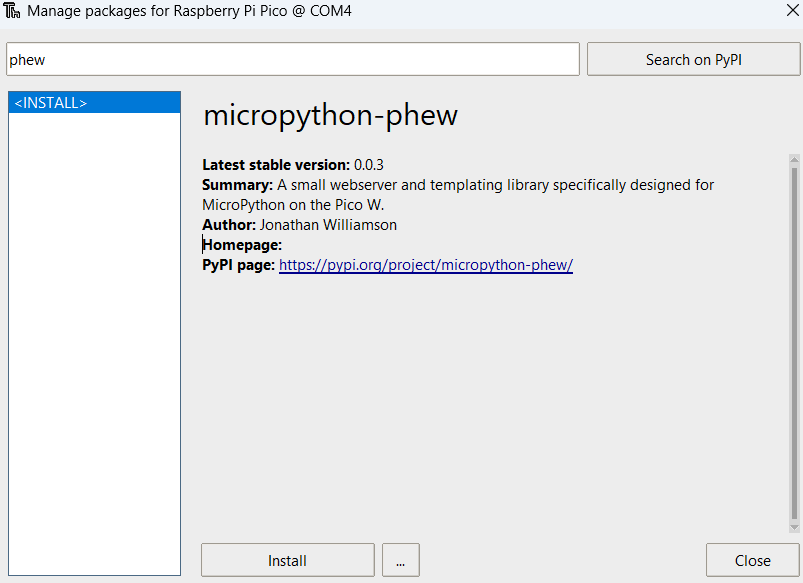
- Go to the Tools -> Manager Packages menu. Enter 'phew' in the search bar and click on 'Search on PyPi'. In the search results, open 'micropython-phew' and then press the 'Install' button.

- Once the installation is done, you should see the 'lib' folder in the 'Files' view. If you expand the folder, you will see all the library files.
- Create a new file by clicking on File -> New and paste the following code. Replace <ssid> and <password> with your Wifi name and password:
from phew import server, connect_to_wifi
from phew.template import render_template

print(connect_to_wifi("<ssid>", "<password>"))

@server.route("/", methods=["GET"])
def home(request):
  return await render_template("index.html", title="Home Page", message="Hello from Pico!")

@server.catchall()
def catchall(request):
  return "Not found", 404

server.run()
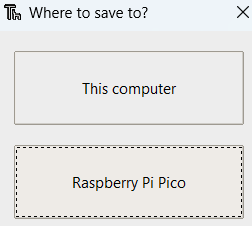
- Press Ctrl-S or go to File -> Save. In the 'Where to save to' dialog, select the 'Raspberry Pi Pico' option. Enter the file name as 'main.py' and press OK. You should now see the saved file in the 'Files' view.

- After this, create a new file and paste the following code:
<!DOCTYPE html>
<html lang="en">
<head>
    <meta charset="UTF-8">
    <meta http-equiv="X-UA-Compatible" content="IE=edge">
    <meta name="viewport" content="width=device-width, initial-scale=1.0">
    <title>{{ title }}</title>
</head>
<body>
    <h1>{{ message }}</h1>
</body>
</html>- Save the file with the filename 'index.html' on the Pi.
- Open the 'main.py' file and either press F5 or click on 'Run -> Run current script' to execute the file. This will start the web server and print logs in the Shell including Pico's IP address.
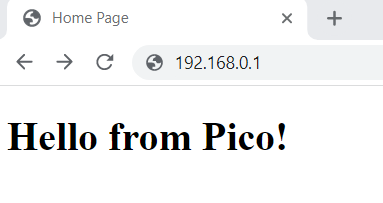
- Now open the IP address in a Web browser and you see the Webpage with the message 'Hello from Pico'.

That's it.You are successfully running a web server on the Pico W with basic HTML and dynamic content. Using the same strategy, you can even host a complete website. We'll publish a tutorial soon to create a website on the Pico with modern CSS styling and JavaScript and Python backend. So stay tuned!